Composting is one of the most rewarding practices you can incorporate into your outdoor gardening routine. Not only does it reduce household waste, but it also enriches your soil, thereby enhancing plant growth and vitality. One of the first steps in starting your own composting journey is to create a compost bin. While you can purchase a ready-made compost bin, building your own can be cost-effective and tailored to your specific needs. Here’s a step-by-step guide to creating your very own compost bin with ease.
Why Compost?
Before diving into building a compost bin, it’s essential to understand the benefits of composting. Composting helps reduce waste by recycling organic material such as kitchen scraps and yard waste, therefore decreasing your carbon footprint. More importantly, compost nourishes your garden, enriched with nutrients that encourage healthy plant growth. By using compost, you reduce the need for chemical fertilizers and contribute to a self-sustaining garden ecosystem.
Step 1: Selecting the Right Location
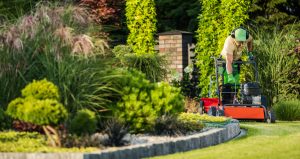
The first step in building your compost bin is selecting an optimal location. An ideal spot is one that is easily accessible yet slightly out of the way to avoid any potential odors or pest issues. Consider placing your bin near your garden for easy access when introducing compost to your soil. The location should have good drainage, be in partial sunlight to accelerate decomposition, and sheltered from strong winds to avoid scattering the material.
Step 2: Choosing Your Bin Type
Compost bins come in various forms and can be crafted from a range of materials. Here are some common types:
– Wire Compost Bin: Made with chicken wire or hardware cloth, this type is inexpensive and straightforward to assemble. It’s best for aeration and leaves a small footprint.
– Wooden Compost Bin: Using pallets or lumber, a wooden bin can be sturdy and aesthetically pleasing. It’s durable and blends seamlessly into most garden landscapes.
– Plastic Compost Bin: These can be made from recycled containers like plastic barrels. A plastic bin is durable and can retain moisture well, promoting decomposition.
For beginners, opting for a simple wire or wooden compost bin might be easiest to construct and use.
Step 3: Building the Compost Bin
For a Wire Compost Bin:
1. Materials Needed: Chicken wire or hardware cloth, wire cutters, pliers, stakes.
2. Construction:
– Cut the wire to your desired height, commonly around 3 to 4 feet.
– Form the wire into a circle of approximately 3 feet in diameter.
– Use stakes to secure the wire circle by weaving them through the wire and anchoring them in the ground.
– For added durability, secure the ends of the wire using pliers.
For a Wooden Compost Bin:
1. Materials Needed: Wooden pallets or lumber, nails or screws, hammer or drill.
2. Construction:
– If using pallets, stand four pallets upright to form a square, securing the corners with nails or cable ties.
– For lumber, construct four panels matching the dimensions you desire.
– Use screws or nails to connect these panels, forming a square box.
– Ensure there are gaps between the slats for aeration.
Step 4: Filling Your Compost Bin
Now that your compost bin is ready, it’s time to fill it. A successful compost pile requires a balanced mix of ‘green’ and ‘brown’ materials.
– Greens: These are nitrogen-rich materials such as fruit and vegetable scraps, coffee grounds, and grass clippings.
– Browns: These are carbon-rich materials such as dried leaves, straw, newspaper, and cardboard.
Aim for a ratio of one part green material to three parts brown material. Layering these materials will aid in aeration and moisture retention, crucial for decomposition.
Step 5: Maintaining Your Compost Bin
To keep your compost healthy and productive, occasional maintenance is necessary:
– Turn the Pile: Every few weeks, use a garden fork to turn your compost, which helps aerate the pile and accelerate decomposition.
– Monitor Moisture: Your compost should remain moist but not soggy. If it becomes too dry, add water or more green material. If too wet, add more brown material to balance.
– Watch for Temperature: A thriving compost pile will generate heat. Properly functioning piles can reach internal temperatures of about 130-150°F. If your pile isn’t heating up, adjust your ratios or aerate more frequently.
Troubleshooting Common Composting Issues
– Odor Problems: If your compost bin smells, it may lack aeration or contain too much green material. Turn the pile and add more brown materials to neutralize odors.
– Pest Issues: To combat pests, ensure you bury any food scraps at the center of the pile and avoid adding meat or dairy products, which attract animals.
Conclusion
Building your own compost bin is a straightforward project that has immense benefits for your garden and the environment. By selecting the right location, type, and maintaining it properly, you’ll soon have a thriving compost that serves as black gold for your plants. Embrace this sacred cycle of nature, and turn what many consider waste into a valuable resource for your stunning outdoor garden. Happy composting!